
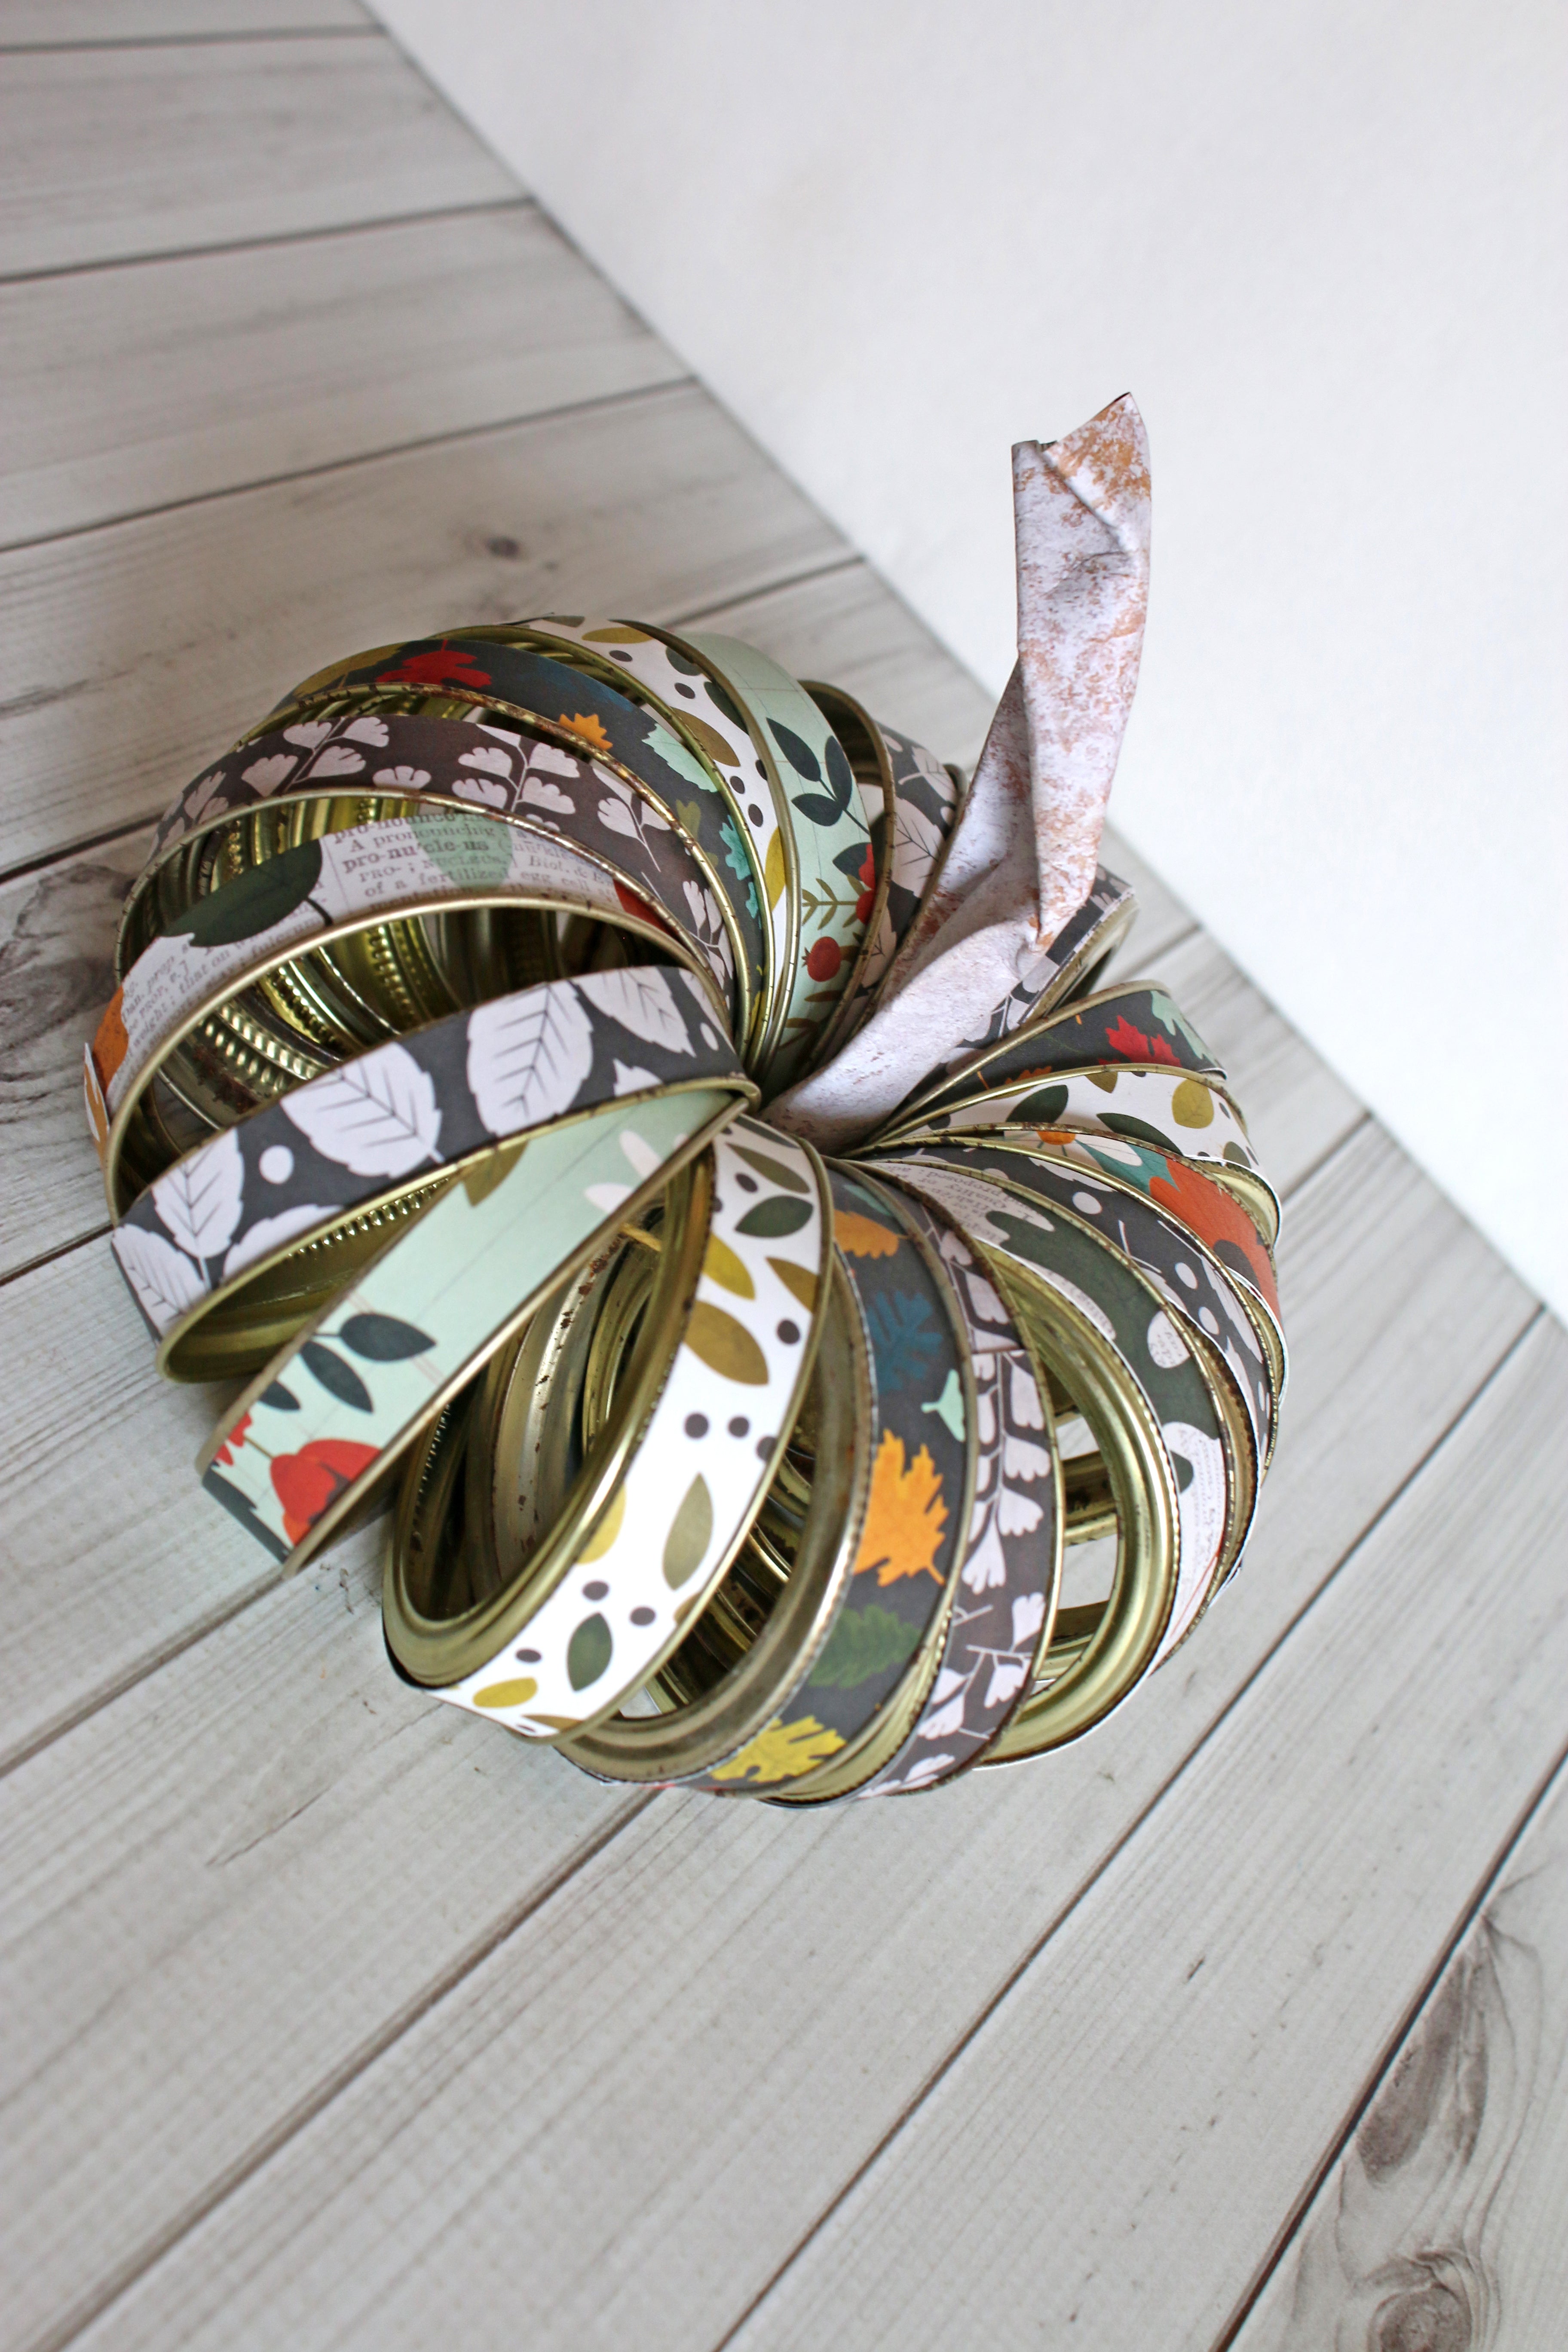
It’s pumpkin season! I love finding different ways to make pumpkins to decorate my house with. This cute little pumpkin makes home or table décor.
MADE BY: SAMANTHA TAYLOR | TIME: 30 MINUTES
LEVEL: BEGINNER | SIZE: 9"

Supplies:
- Glue Dots® Permanent Glue Squares
- Craft Glue Dots®
- 18 Canning Jar Rings
- Patterned Paper in 6 different patterns
- Card stock or mono-colored patterned paper
- Yarn, String, or Twine
Directions:
- Cut 3 – 12” x ½” strips from each of 6 different patterned paper (for a total of 18 strips).

- Use Permanent Glue Squares® to attach 1 strip of paper to each canning jar ring.

- String all 18 lids onto a length of twine, yarn, or string. Cinch the string up tight around the middle and secure with a knot.

- Arrange the lids in a circular, pumpkin shape (the string should be doing most of the work for you).

- Cut a length of card stock or mono-colored patterned paper to 4” x 6”. Roll the paper into a tube shape. Use Craft Glue Dots® to secure the edges.

- Squeeze and crumple your tube to create a more natural stem shape. Use Craft Glue Dots® to secure the stem to the center of the pumpkin.

Notes:
I chose Glue Squares® for the canning ring part of this project because the small size was perfect on the slim edges of the canning lids. Glue Squares® are also great for working with more than one medium at a time (paper to metal).
I chose Craft Glue Dots® for the stem because they are slightly thicker, and the gooier nature helps to hold while I bent and crinkled the stem. However, you should be able to use Ultra Thin Glue Dots® or Glue Squares® with equal success.
I used standard size canning lid rings, but wide-mouth rings will also work great with this project and yield a slightly larger pumpkin.