
We're sharing our final project from our Birthday Memories Guide that was featured in Hobby Lobby's Stamping, Stationery and Scrapbooking magazine.
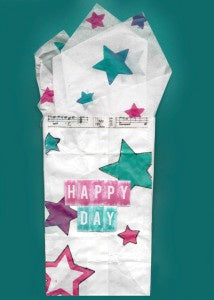
Have a little fun and get creative with your gift wrap with DIY stamps! Below are instructions, including a great video tutorial by Designer Jessica, who shows you how easy it is to make your own stamps to create a cute birthday bag for that special birthday kid!
Time: 20 minutes
Level: Beginner
Designed by: Jessica Griffin
Supplies:
- Ultra-Thin Glue Dots®
- Micro Glue Dots®
- 1” Glue Lines®
- White gift Bag
- White tissue paper
- Washi tape
- Spellbinders 5 Stars die cuts
- Die cut machine
- Alphabet stickers
- Foam
- Chipboard
- Variety of ink pad colors
Directions:
- Cut three or four different size stars from the foam using star dies and die cut machine.
- Cut pieces of chipboard to fit the foam stars and adhere using Micro Glue Dots on the points and Ultra Thin Glue Dots in the center.
- Stamp stars on to tissue paper using a variety of sizes and colors. Set aside to dry.
- Apply washi tape around the top of the gift bag.
- Stamp several stars on gift bag using various colors of ink.
- Adhere alpha stickers to 1” Glue Lines and then adhere to gift bag spelling out “Happy Day.”
- Let ink dry before assembling gift in gift bag with tissue paper.
Check out Jessica's video tutorial below on how to make your own stamps for this project:
Connect with Jessica for more inspiration and videos!
Don't forget to check out these other great projects from our Birthday Memories Guide:


Have you subscribed to our blog yet? Sign up here and don’t miss our next project series!
Thanks for stopping by!
~The Team at GDI