
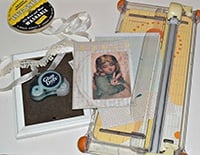
Designer Donna from Memes Art Place shows you how to make a cute nursery decoration that's quick and easy. All you need is a frame, an image, Glue Dots, patterned paper, and embellishments (optional). It's soft and sweet and will add just a touch of vintage to your nursery's decor.
Designed by: Donna Budzynski
Time: 30 minutes
Level: Beginner
Size: 5” x 7”
Whether you're making a nursery decoration as a gift for a friend's nursery or your own, here's a quick way to add a touch of vintage to the decor.
Here's what you need:
- 1" Glue Lines®
- Ultra-Thin Glue Dots®
- 5” x 7” Frame
- Paper
- 3" x 5" vintage card or photo (I used an image from The Graphics Fairy)
- Embroidery Floss

- Small resin decorative frames by Melissa Frances
- Butterflies
- Paper Trimmer
- Scissors
- Other embellishments as desired
Here's what you do:
- Find your graphic or picture you will use and size it to a 3” x 5” print.
- Trim and cut all of your paper pieces that you have chosen and lay them out. Use the cardstock that came with the frame as your size guide.
- Start adhering your papers together using Ultra-Thin Glue Dots.
- Adhere banner flags to embroidery floss using 1" Glue Lines.
- Adhere banner to outside of frame and embellish as you like – I used butterflies and white resin frames.

***Embellish any way you would like. I was going to incorporate lace and ribbon, but I decided to go with the resin frames and butterflies instead. Flowers would be very pretty also. Make it your own!
~Donna
Use either format of Ultra-Thin Glue Dots for this project:

Glue Dots products are available at the following retailers:
![]()


